Working under hazardous conditions is unavoidable for many companies. This makes it even more important that employees comply with all the regulations that apply to a particular work area.
However, the regulations must be easily understood and immediately recognisable in all work areas.
Creating a visual workplace
A visual workplace is a tidy workplace that is visually recognisable to every employee. The risks in a certain area must be immediately understood by everyone, as this improves safety at the workplace.
It also enables employees to be more productive. They won’t be confused about whether or not they can enter certain areas.
So, how do you create a visual workplace?
Organizing can be done in 5 ways, using the following aids:
- pictograms
- status marking
- zone marking
- lockout tag
- pipe marking
Below, we discuss how and when to use a specific type of warning sign within your company to provide extra protection for your employees.
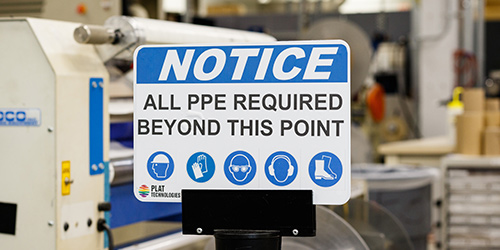
Signs
There are two things an employee needs to know before entering an area;
- What are the risks in this area?
- How can I protect myself from these risks?
Signs provide immediate and clear answers to these two important questions. Place the correct pictograms in all high-risk areas. This will often prevent major mistakes which could have serious consequences.
The sign colours perform an important function. First of all, they convey the message. Then, each colour represents a specific meaning regarding safety.
- Red conveys the most critical warning, and is used to signal a mandatory prohibition or for fire-fighting equipment.
- Yellow is a caution warning.
- Green refers to safety and escape routes.
- Blue represents a command.
The shape of the signs also has a meaning. Round signs are mandatory, triangles are a warning and rectangles mean safe conditions.
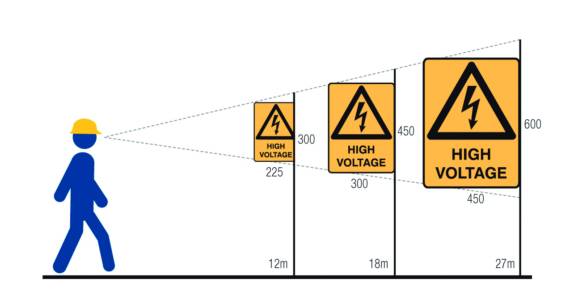
Pictograms are available in various formats. The size you need for a certain area in your company depends on the reading distance.
Use the drawing below as a guide so that the pictograms you use are as legible as possible.
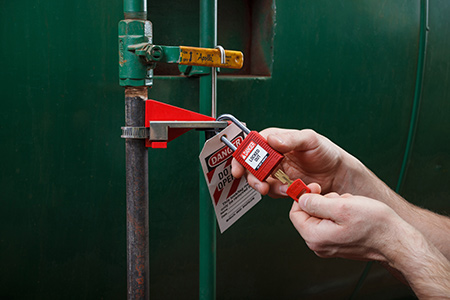
Status marking
Status marking lets you know immediately that you must not use a machine or device.
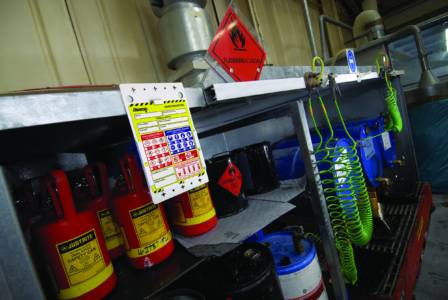
Status markings are also known as visual tags.
Use these when a machine or device is temporarily out of service for inspection or maintenance. Status marking is also very suitable for checklists, for example for the identification and naming of chemical products.
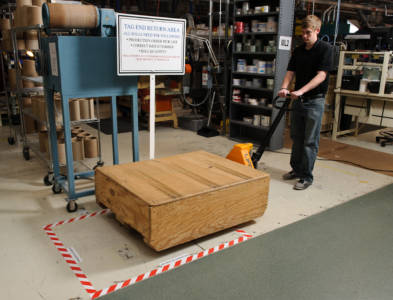
Zone marking
Zone marking conveys visually the information that entering a certain zone is forbidden. This is most commonly used in areas such as warehouses, loading docks and lanes.
You may think of cordoning off an area using only tape. But there are many other options for cordoning off a dangerous area. You might think that your only option for cordoning off an area is by using tape.
However, you could also use posts with chains, or cones, or fold-out signs. Even ‘glow in the dark’ marking is possible. During an emergency, this type of marking clearly shows the route to the nearest emergency exit, even in the dark.
Lockout/tagout
Lockout/tagout protects your employees against the dangers of electric current, and machinery in operation.
A planned safety procedure ensures that equipment and machines are switched off. Once that has been done, specialists can carry out maintenance or repairs.
There are many advantages to a lockout/tagout program:
- fewer work-related accidents
- lower costs
- higher productivity
- best safety practices
Lockout/tagout is something that needs to be very carefully thought out. You need to prepare a LOTO program, making it a process that everyone in your company must adhere to.
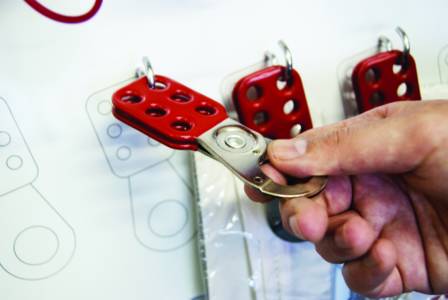
The best known examples of lockout/tagout products are padlocks, lock boxes and various locking systems.
There are three types of key systems for padlocks: keyed different, keyed alike and master keyed. The system you choose depends on your company's circumstances. You will need to find a compromise between convenience and safety.
- Keyed different: With this system, you can't open one padlock using the key to a different padlock. This system is best used in circumstances where employees are only allowed to open their own lock.
- Keyed alike: This system uses identical locks, which can be opened with the same key. Use this system when someone is assigned multiple locks.
- Master keyed: With this system, there are several locks with their own key, and one master key. Ideal for employees who have to open their own locks, but some control is still needed. The supervisor has a master key to unlock any of the locks.
Would you like to manage your lockout/tagout program even more efficiently? In that case, use shadowboards.
These ensure that your locking systems and padlocks are returned to the correct place. This increases efficiency in the workplace.
Pipe marking
Pipe marking is required by law. Pipes carrying hazardous substances must be identified in accordance with European Directive 92/58.
By investing in the correct pipe marking, you can prevent accidents at work. Ignorance can sometimes have serious consequences for the safety of employees.
It is important to know where and how to mark pipes. Do this on all visible parts of the pipes, and make sure you attach the stickers to a clean and dry area.
Depending on the applicable legislation, pipe markings have specified colours.
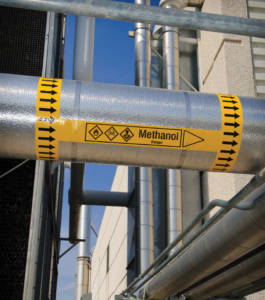
Pipe marking usually includes the following details:
- flow of the hazardous substance
- relevant hazard symbols (CLP)
- identity of the dangerous substance
- a signal word, for example ‘warning’
- a corresponding colour